Augmented reality is a neat concept. We take a view of the world around us and supplement it with images, text, sound and video. Tech companies are starting to explore the possibilities of AR with devices such as the Meta Glasses, Microsoft HoloLens and Magic Leap. These very exciting AR headsets are not quite ready for consumer release yet, so it may be a little while before every household has a pair. However, there is another way of introducing the world to augmented reality using something they may have easier access to – the mobile browser.
I’ll show how you can use a JavaScript library called awe.js to create an augmented reality experience on the mobile web. We’re going to create a 3D control board that opens on top of a paper marker. We can hook it up to do pretty much anything that can be enabled via a JavaScript HTTP request, so I’ve set it up to change the color of my LIFX lightbulb using IFTTT.
What You’ll Need
For this demo, you’ll currently need Google Chrome for Mobile. It may potentially work on Firefox for Mobile too, however I found click events didn’t trigger for me when I tried it on my HTC One M9. It also works on some desktop browsers (Chrome and Opera worked quite nicely on my Mac) but definitely isn’t quite the same experience as a smartphone with touch events. It could be neat on a tablet though.
You’ll also need an IFTTT account and a knowledge of how to set up the the Maker Channel with rules that trigger on HTTP requests. If you’re new to IFTTT.
Lastly, you’ll need to print out a marker onto a piece of paper. The marker we’ll be using is this one:

The code
If you’d prefer to get straight into the code and try it out, it is all available on GitHub.
Awe.js
Awe.js is a JavaScript library that uses Three.js, your device’s camera and some pretty smart techniques to create augmented reality in the browser. You can download the library and some samples on the awe.js GitHub repo. It provides four different sorts of AR experiences, each with their own example in the repo:
geo_ar– Allows you to place objects at set compass points.grift_ar– Compatible with an Oculus Rift.leap_ar– Integrates with the Leap Motion controller.marker_ar– Allows you to create an experience that is positioned on Augmented Reality markers. This is the one we’ll be working with in this demo.
Our Augmented Reality Demo Code
Our demo code is over 300 lines long, but a lot of it is repeated code for similar objects. I’d recommend downloading the demo code from the demo’s GitHub repo and following along with the explanations provided here. Once you’ve got an idea of how it all works, try tinkering away and building something of your own.
Everything starts within the load event on our window. The very first thing we include is a variable to track whether our AR control panel (I’ve called it a “menu” for short here) is open or not. Initially, it is closed.
window.addEventListener('load', function() {
    var menu_open = false;

    // Our code continues here
  });
Then, we start to use the awe.js library. Everything we do is defined within the window.awe.init() function. We start with some global settings for our AR scene.
window.awe.init({
    device_type: awe.AUTO_DETECT_DEVICE_TYPE,
    settings: {
      container_id: 'container',
      fps: 30,
      default_camera_position: { x:0, y:0, z:0 },
      default_lights: [{
        id: 'point_light',
        type: 'point',
        color: 0xFFFFFF
      }]
},device_type– All of the examples set this toawe.AUTO_DETECT_DEVICE_TYPEwhich requests it to detect the device automatically. So far I haven’t seen a need to change this.settings– Settings we may actually want to change live within here. These include:container_id– The ID of the element our whole experience is going to be generated inside.fps– Our desired frames per second (optional).default_camera_position– The default camera position that we will be viewing our scene from (we’re starting it at (0,0,0)).default_lights– We can set up an array of different Three.js lights for our scene, giving each an ID, defining the type of light it is and its color. Our demo has only one white Three.js PointLight. There are a range of options available for the type of light, which correspond to different types of Three.js lights –'area','directional','hemisphere','point'and'spot'.

Once our settings are in place, we then define what to do when awe.js has initialised. Everything is wrapped within a awe.util.require() function which defines what browser capabilities it requires before loading additional JavaScript files we’ll need. Be careful to only define the browser capabilities you do need for the demo, as you can unnecessarily prevent your AR app from working in some browsers if you define these incorrectly using capabilities listed in some of their other GitHub examples. For example, in order to have elements positioned based upon compass points you need access to the 'gyro' capability. That won’t work on most desktop browsers. We don’t need that in this demo, so we exclude it.
ready: function() {
    awe.util.require([
      {
        capabilities: ['gum','webgl'],
The files that are defined pull in specific functionality for awe.js – lib/awe-standard-dependencies.js, lib/awe-standard.js and lib/awe-standard-window_resized.js each are pretty common, defining the standard bits and pieces for awe.js and handling window resizing. Our demo uses markers, which requires the other two files listed below those.
files: [
    ['lib/awe-standard-dependencies.js', 'lib/awe-standard.js'],
    'lib/awe-standard-window_resized.js',
    'lib/awe-standard-object_clicked.js',
    'lib/awe-jsartoolkit-dependencies.js',
    'lib/awe.marker_ar.js'
  ],
Once we’ve got all of those files successfully loaded, we run the aptly named success() awe.js function. The first function you’ll always run when you’re ready to start displaying elements sets up the awe.js scene.
success: function() {
    window.awe.setup_scene();
All elements in awe.js are positioned within “Points of Interest” (POI). These are specific points in the scene marked via coordinates that objects can be positioned inside of. You can move POIs around within awe.js as well as elements themselves. We create a single POI which will be placed wherever a specific paper marker is seen. To create a POI, we use the awe.js function of awe.pois.add().
I’ve given it an ID of 'marker' but you could call it anything you’d like, as long as you are consistent throughout other references to this POI in the code. We set its initial position to be (0,0,10000), which positions it off into the distance a bit until we’re ready to use it. We also set it to be invisible until we spot the marker.
awe.pois.add({id: 'marker', position: {x: 0, y: 0, z: 10000}, visible: false});Elements we add into our POIs are called “projections” within awe.js. The first projection we add into our scene I’ve called 'wormhole', as this is a flat black square where our menu items will magically appear out of. Just as the ID of the POI, you could name yours absolutely anything, as long as you keep it consistent with other references to it in your code. We add it into our POI using the function awe.projections.add().
awe.projections.add({
    id: 'wormhole',
    geometry: {shape: 'plane', height: 400, width: 400},
    position: {x: 0, y: 0, z: 0},
    rotation: {x: 90, z: 45},
    material: {
      type: 'phong',
      color: 0x000000
    }
  }, {poi_id: 'marker'});
There are quite a few options for the objects we can add as projections, so I’ll explain them in more detail. Take note – all x, y and z values here for positioning and rotating are in relation to its POI. That POI is defined at the very end by its ID as {poi_id: 'marker'}.
geometry– This refers to the projection’s Three.js geometry options. The options required for each type of geometry match those provided in awe.js. For example, SphereGeometry in Three.js would be represented as{shape: 'sphere', radius: 10}in awe.js. One thing to note for those using the latest Three.js, in the currently available version of awe.js, BoxGeometry is still using CubeGeometry. So, to create boxes, we use the format{shape: 'cube', x: 20, y: 30, z: 5}(despite the name, it does not need to be a “cube”).position– You can adjust the item’s x, y and z axis in relation to its POI.rotation– You can rotate the item by its x, y and z axis in relation to its POI. I rotate the wormhole 90 degrees on its x axis so that it sits flat on the table and 45 degrees by its z axis as I thought that looked more natural (it doesn’t quite line up exactly with the marker at all times, so having it on a diagonal makes this less obvious).material– This defines the projection’s Three.js material. I’ve stuck to using'phong'(MeshPhongMaterialin Three.js), however it looks like'lambert','shader','sprite'and'sprite_canvas'are also potentially available as options. We can also define its color in hex.texture– This is not used in the demo but I wanted to include it in this article for completeness. To define a texture, you can includetexture: {path: 'yourtexturefilename.png'}.
In the demo, I add seven different boxes/cubes to the scene, each one is 30 pixels high and placed 31 pixels lower on the y axis so that it is originally hidden by the wormhole. They’re all slightly different widths to make them look a bit like a lightbulb.
I move them a little bit back from the center of the wormhole via their x and z coordinates but to be honest, it’d probably look fine remaining at 0 for those too if -5 bugs you. I’ve got it rotated 45 degrees on the y axis so that it faces at a nice angle on top of the wormhole.
awe.projections.add({
    id: 'ar_button_one',
    geometry: {shape: 'cube', x: 60, y: 30, z: 5},
    rotation: {y: 45},
    position: {x: -5, y: -31, z: -5},
    material: {
      type: 'phong',
      color: 0xFF0000
    }
  }, {poi_id: 'marker'});
Each of these has an ID of 'ar_button_{NUMBER}' where the number is the index of the menu button from bottom to top. We’ll use this ID in our HTTP calls to IFTTT, so keeping these consistent and accurate is important!
After our projections are defined, we define a rather important piece of our AR puzzle – our marker detection event. We add this as an array passed to the function awe.events.add().
awe.events.add([
    // Our events here
  ]);
We’ve only got one awe.js event, so there is just one single event here. The event is defined with an ID that we could call anything. I’ve called it 'ar_tracking_marker'. We define the types of devices it is applicable to. This seems to be the same in all awe.js examples so far in their repo, so I’ve left it as is with PC and Android set to 1.
id: 'ar_tracking_marker',
  device_types: {
    pc: 1,
    android: 1
  },
Then we have register() and unregister() functions to add and remove the event listener that is watching for the marker.
register: function(handler) {
    window.addEventListener('ar_tracking_marker', handler, false);
  },
  unregister: function(handler) {
    window.removeEventListener('ar_tracking_marker', handler, false);
  },
We then define the event handler which will run once we spot a marker. We look out for the “64” marker and only run a response when we find it.
handler: function(event) {
    if (event.detail) {
      if (event.detail['64']) {
        // Our response!
      }
Within our response to finding a marker, we want to move our POI that we called 'marker' onto the spot with our physical paper marker and make it visible. We transform it to align to the physical marker using event.detail['64'].transform.
awe.pois.update({
    data: {
      visible: true,
      position: {x: 0, y: 0, z: 0},
      matrix: event.detail['64'].transform
    },
    where: {
      id: 'marker'
    }
  });
We also set our 'wormhole' projection to be visible.
awe.projections.update({
    data: {
      visible: true
    },
    where: {
      id: 'wormhole'
    }
  });
If we don’t see the marker but our menu is open, we’ll set it to remain open but hide the wormhole. The main reasoning for this is that with some of the light changes, the marker may become illegible. We don’t want to trap ourselves into a specific color light with no way of turning back!
else if (menu_open) {
    awe.projections.update({
      data: {
        visible: false
      },
      where: {
        id: 'wormhole'
      }
    });
  }
If there is no marker and our menu isn’t open, then the whole POI is hidden waiting for us to view it.
else {
    awe.pois.update({
      data: {
        visible: false
      },
      where: {
        id: 'marker'
      }
    });
  }
We finish by telling awe.js to update the scene.
awe.scene_needs_rendering = 1;The last bit of actual functionality that we’ll be setting up is our click events. All of these are within the object_clickedevent.
window.addEventListener('object_clicked', function(e) {
    // Our click events
  });
Our click event contains the ID of the projection that was clicked within e.detail.projection_id. We use a switch statement to determine how to react to the click. Clicks on the wormhole open and close the virtual menu, whilst clicks on the virtual menu buttons will trigger our light colors. We use a switch statement as each of the buttons will run the same response code.
switch (e.detail.projection_id) {
    case 'wormhole':
      // Clicks to open and close our menu
    break;
    case 'ar_button_one':
    case 'ar_button_two':
    case 'ar_button_three':
    case 'ar_button_four':
    case 'ar_button_five':
    case 'ar_button_six':
    case 'ar_button_seven':
      // Clicks on our virtual menu buttons
    break;
  }
Our wormhole click events open and close the menu depending on whether menu_open is true or false. If it is false, then we use the awe.js awe.projections.update() function to animate each button up on the y axis over one second. That moves it up out of the wormhole. The only difference between each projection’s movement is how much each object moves over the y axis.
if (!menu_open) {
    awe.projections.update({
      data: {
        animation: {
          duration: 1
        },
        position: {y: 35}
      },
      where: {id: 'ar_button_one'}
    });
Otherwise, if the menu is open, then we move them all back to their initial position under the wormhole and hidden from view.
else {
    awe.projections.update({
      data: {
        animation: {
          duration: 1
        },
        position: {y: -31}
      },
      where: {id: 'ar_button_one'}
    });
After our if else statement, we toggle menu_open to the opposite of what it was so we track where it is up to.
menu_open = !menu_open;Within our button click event, we make a HTTP request to IFTTT which includes our button’s ID as the event name and our key to access the IFTTT service. We don’t really use the data that comes back, we log it to the console for debugging purposes but otherwise, the actual results come from IFTTT reacting to the HTTP call.
...
  case 'ar_button_seven':
    var request = new XMLHttpRequest();
    request.open('GET', 'http://maker.ifttt.com/trigger/'+e.detail.projection_id+'/with/key/yourkeyshouldbehere', true);

    request.onload = function() {
      if (request.status >= 200 && request.status < 400) {
        var data = JSON.parse(request.responseText);
        console.log(data);
      }
    };

    request.send();
  break;
After all of this, if awe.js does not load up because of incompatibilities and so forth, we have an alternative script that loads to show an error message.
{
    capabilities: [],
    success: function() {
      document.body.innerHTML = '<p>Try this demo in the latest version of Chrome or Firefox on a PC or Android device</p>';
    }
  }
It is HTTPS Time
Update as of late 2015 – I’m jumping back into this article to add a new bit of rather important info – Chrome now requires that webpages using the camera are served over HTTPS. So before attempting to run this, you’ll need to find a way to run your service over HTTPS. One method I’ve used so far for testing is ngrok, which can provide a HTTPS tunnel to your localhost. there’s a guide over at Accessing Localhost From Anywhere which can help get you started.
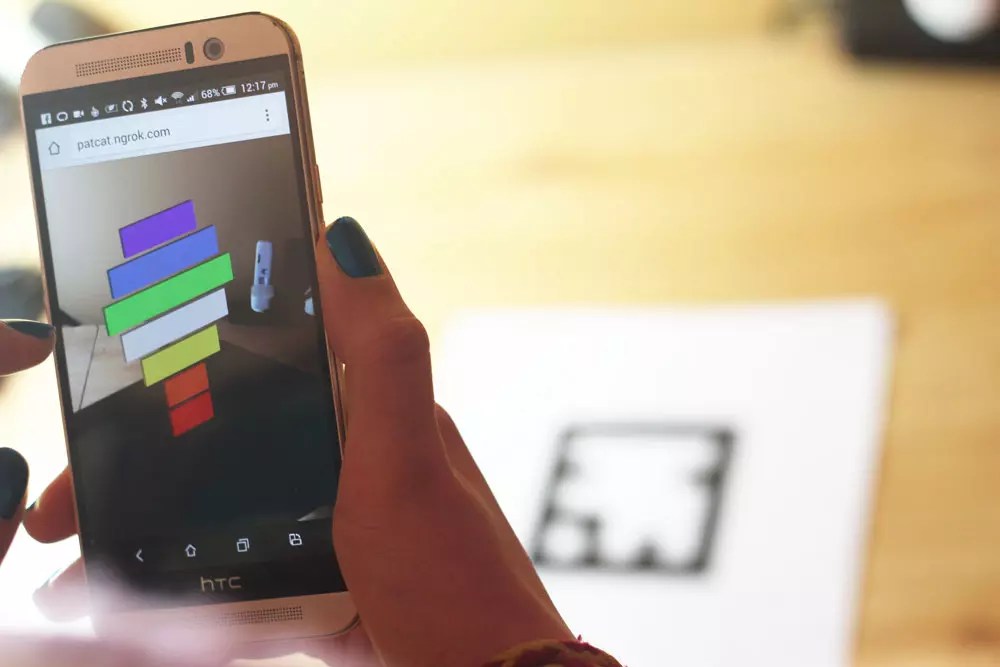
The Demo in Action
If we run this code on Google Chrome for Mobile and point it at our marker, a wormhole should appear.

If we click the wormhole, our menu buttons should animate up into their correct spots.
If we click one of the menu items…

It should change the color of our LIFX light!
